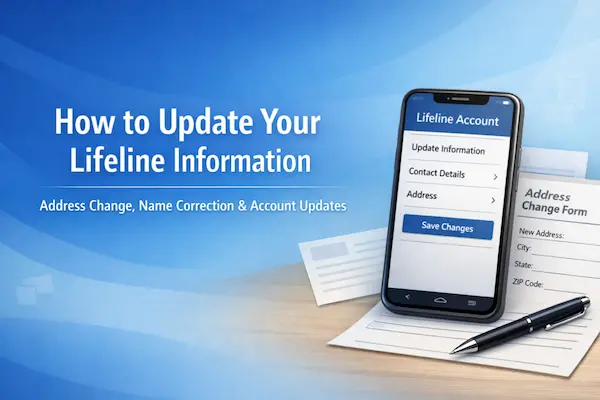
How to update your Lifeline information (address, name)
You can update your Lifeline information by starting with your Lifeline phone or internet company and giving them the exact change.
Most updates are simple, but small mismatches in your name or address can trigger delays, duplicate-household flags, or requests for documents.
This tutorial walks you through a clean, low-stress way to keep your benefit accurate when you move, change your name, or your household situation shifts.
Independent info notice: This guide is educational and independent.
It is not affiliated with, sponsored by, or controlled by the FCC, USAC, or any Lifeline provider.
Program rules and provider processes can change, so always follow the instructions you receive from official channels.
Why you should update your Lifeline information quickly
You should update your Lifeline information as soon as something important changes, because Lifeline is one benefit per household and it relies on accurate records.
If your information is outdated, you may get flagged for duplicates, miss notices, or run into enrollment problems when you try to transfer service.
In practice, the most common “uh-oh” moments are moving to a new home, adding an apartment number, changing your legal name, or realizing someone else at your address also has Lifeline.
USAC guidance for consumers also encourages you to notify your provider when you change address, no longer qualify, or there may be more than one Lifeline benefit in the household.
Think of it like updating your bank mailing address, because doing it early prevents annoying surprises later.
What counts as “update your Lifeline information”
Updating your Lifeline information usually means correcting or changing the personal details tied to your benefit record.
That can include your residential address, legal name, date of birth corrections, or details that affect household and eligibility.
Some changes are “service-provider handled” updates, while other changes can require extra verification in the National Verifier system if an automatic check fails.
If you’re unsure which bucket your change falls into, you can still follow the same process below and let the system tell you what it needs.
Step-by-step: update your Lifeline information (1–8)
1) Identify the change
Write down what you’re updating, like a new address, a legal name change, or a household situation.
Use your exact USPS-formatted address, including apartment or unit numbers.
2) Gather matching details
Have your legal name, date of birth, and SSN last 4 digits or Tribal ID ready.
Also keep your Lifeline phone number or account number and your provider name.
3) Ask your provider to update your Lifeline information
Contact your Lifeline phone or internet company and request to update your Lifeline information.
Ask for a confirmation or ticket number to track the request.
4) If your address doesn’t validate
If the new address can’t be verified automatically, you may need proof like a lease, utility bill, or government letter.
Make sure it shows your full name and complete address.
5) If you get a duplicate-household flag
Lifeline allows one benefit per household, meaning people who share money and expenses.
If you’re separate at the same address, you may need a Lifeline Household Worksheet.
6) If you changed your legal name
Use documents that connect your old name to your new name, like a marriage certificate, court order, or updated ID.
Keep spelling and punctuation consistent everywhere.
7) If income or eligibility changed
Confirm you still qualify through a program or income rules for your household size.
If asked, submit recent proof that matches the timeframe requested.
8) Save proof and follow up
Save screenshots, copies, and the date you reported the change.
Check status with your provider first, then contact the Lifeline Support Center if needed.
Documents you’ll need
You usually only need documents if the system cannot automatically confirm your identity, eligibility, or address.
When proof is required, send copies of official documents that clearly show the specific items being requested.
| What they need to confirm | Good document examples | Tips that prevent delays |
|---|---|---|
| Identity | Driver’s license, state ID, passport, Tribal ID | Make sure the image is readable and not cropped. |
| Address | Lease, mortgage statement, utility bill, government letter, insurance statement | Use a document that shows your full name and the complete new address. |
| Program participation | Benefit award letter, statement of benefits, official eligibility letter | Use the most recent document with your name and the program name visible. |
| Income | Pay stubs, tax return, Social Security statement, unemployment benefits statement | Choose proof that matches the income period requested, especially if your income varies. |
| Household separation | Lifeline Household Worksheet when another Lifeline subscriber is at your address | Answer every question fully and keep your story consistent across documents. |
| Name change | Marriage certificate, court order, updated government ID | Make sure your new name matches across documents to avoid a mismatch. |
- If you live with someone who already has Lifeline at the same address, you may be required to complete a household worksheet.
- If you moved into a multi-unit building, include your unit number everywhere, because missing units are a top cause of address problems.
- If you are submitting photos, use bright lighting and capture the full page with all four corners visible.
Before you submit
You can avoid most delays by doing a quick accuracy sweep before your provider sends the change.
- Match your ID: Confirm your name and date of birth match your official documents exactly.
- Fix the address format: Include apartment, lot, unit, or floor, and avoid extra punctuation that is not part of the address.
- Avoid duplicate requests: Do not submit the same update through multiple channels at once unless you are told to do so.
- Confirm your household: If you share money and expenses, you are one household and should have only one Lifeline benefit.
- Prepare for a worksheet: If someone else at your address gets Lifeline, expect household questions and answer them consistently.
How to check status
You can check status by starting with your Lifeline provider, because they can confirm whether they submitted the update and whether anything bounced back.
If you need help beyond your provider, USAC’s Lifeline Support Center can help you understand what the system is asking for and what to do next.
- Phone: (800) 234-9473.
- Email: LifelineSupport@usac.org.
- Hours: 7 days a week, 9 a.m. to 9 p.m. Eastern Time.
- What to include: Your first and last name, your application number if you have it, and the reason you’re contacting them.
If your issue is specifically about annual recertification notices, follow the instructions on your recertification letter because the status method can differ.
How long it takes
Many updates are fast once your provider has the correct information, but timelines stretch when documents are required or when an address cannot be validated automatically.
Providers are required to update subscriber changes in the Lifeline database within a defined business-day window after they receive a change to your information.
Manual review can add time, so it helps to submit clean documents the first time and respond quickly if you are asked for something specific.
- Address updates can complete quickly when the address passes automated validation.
- Duplicate-household situations take longer because a worksheet may be required.
- Name changes often move faster when you provide a clear legal document that ties the old name to the new name.
If you are on a tight deadline, ask your provider what they see in the system and whether a pending document request is holding things up.
And if you get denied
If your update or verification gets denied, the fastest fix is to identify the exact reason and correct only what is causing the failure.
Denials and errors are often triggered by mismatches, unreadable documents, missing unit numbers, or household duplication at the same address.
Common denial reasons and the quickest corrections
- Name mismatch: Re-submit using the exact spelling from your government ID and include the legal name-change document if applicable.
- Address mismatch: Add apartment or unit numbers, remove extra text, and use a proof document that shows your full address clearly.
- Duplicate household flag: Complete the household worksheet if you are a separate household at an address with another Lifeline subscriber.
- Unclear documents: Upload a sharper image, avoid glare, and ensure the full page is visible with your name and required details.
- Eligibility questions: Submit the most recent program document or income proof that matches the requested timeframe.
What to do next after a denial
- Read the denial or error message carefully and highlight the exact field that failed.
- Fix only that field first, because changing multiple things at once can create new mismatches.
- Re-submit the corrected information through your provider or the verification path you were instructed to use.
- Call the Lifeline Support Center if the message is unclear or if you believe the system is confusing your record with someone else’s.
- Keep a record of what you sent, including dates, because it helps support agents track the right case.
If you live in a state with a separate Lifeline process, follow that state’s instructions because the forms and verification path can vary.
Real-life scenarios that trip people up
If you recognize yourself in one of these, you can prevent a denial by preparing the right proof upfront.
You moved in with roommates
If you share groceries, rent, and bills, you are one household and should only have one Lifeline benefit.
If you live together but keep finances separate, expect household questions and be ready to complete a household worksheet if another subscriber is already at the address.
You changed apartments but stayed in the same building
If only your unit number changed, treat it like a full address change and update the unit everywhere.
Missing unit numbers are one of the fastest ways to trigger an address validation problem.
Your income fluctuates month to month
If you qualify based on annual or guideline-based income, keep a neat folder of pay stubs or benefit statements so you can prove the right period quickly.
If you no longer qualify, ask what to do next right away, because waiting can create complications.
One last safety note
Only share sensitive information through official, secure methods, and follow the instructions you are given by your provider or the Lifeline Support Center.
If anything feels off, pause and contact official support using known phone numbers rather than replying to unexpected messages.
With the steps above, you can update your Lifeline information confidently and keep your benefit running smoothly.