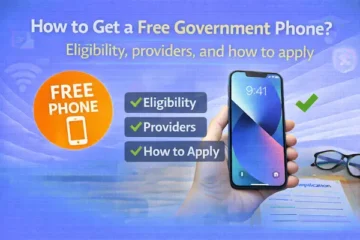
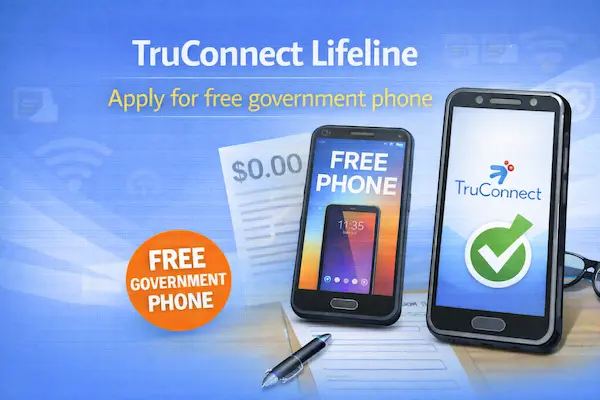
TruConnect Lifeline – Apply for free government phone
Learn TruConnect Lifeline eligibility, ZIP-based availability, free phone expectations, required documents, and the safest way to apply.
You might also be searching phrases like truconnect free government phone or free government phone truconnect, hoping it means a guaranteed device.
The most honest answer is that Lifeline is a service discount first, and any phone offer depends on eligibility, ZIP code, and inventory.
That’s why this guide keeps the process simple, realistic, and focused on the steps that actually get you approved.
You’ll start with availability by ZIP code, because provider availability depends on ZIP code.
Then you’ll compare alternatives, so you’re not stuck if TruConnect is unavailable where you live.
Independent content notice.
This article is informational and independent.
We are not affiliated with, endorsed by, sponsored by, or able to control TruConnect or any other carrier, agency, or third-party platform mentioned here.
Plans, device promotions, and availability can change at any time based on ZIP code, eligibility rules, and provider inventory.
If you want a simple checklist you can follow line by line, use apply Lifeline online for a free government phone.
If you’re focused on devices, read free cell phones from the government so you know what “free” typically means.
If you already submitted forms and you’re waiting, use check Lifeline application status before you reapply and create duplicates.
Top providers near you (ZIP-based) for TruConnect Lifeline
The top “near me” options are the providers that are actually available in your ZIP code.
That’s why two people in the same city can get totally different provider results.
Use this shortlist as your starting point, then confirm availability during enrollment.
- TruConnect Lifeline is often searched as truconnect lifeline program and can appear in many ZIP-based results.
- SafeLink Wireless is commonly compared when you want another Lifeline route with wide ZIP-based availability.
- Assurance Wireless is often checked when you want a guided signup flow and quick ZIP confirmation.
- Life Wireless is frequently used as a backup when device inventory varies across providers.
- Access Wireless can be a practical fallback when you need a second option fast.
- Q Link Wireless may appear in some areas, so it can be worth checking as an alternative.
- Local home phone or broadband providers may participate if you want the discount on home service instead of mobile.
Read also: If you already have Lifeline and want to change later, follow how to switch Lifeline providers to avoid downtime.
Content related: If you’re moving across state lines, plan ahead with transfer Lifeline to a new state so you don’t lose your benefit mid-move.
What each provider offers
To keep your comparison fair, each provider card follows the same order every time.
You’ll see Coverage, then Data/Talk/Text, then Device options, then ID requirements, then Pros/Cons, then How to apply.
TruConnect Lifeline
Coverage: Coverage depends on your ZIP code, and real-world signal depends on your local area.
Data/Talk/Text: Your truconnect lifeline plan details can vary by state and current offer, so the enrollment summary is what counts.
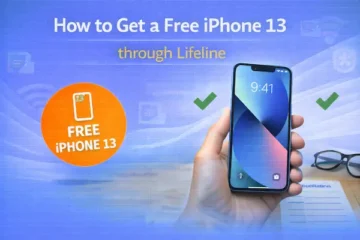
Device options: Searches like truconnect lifeline free phone, truconnect government phone, and truconnect wireless free phone are common, but device promotions are not guaranteed for every approved applicant.
ID requirements: Expect identity and eligibility verification, and be ready to upload documents if automated checks cannot confirm you.
Pros: When available, truconnect lifeline phone service enrollment is usually designed for simple online steps.
Cons: A truconnect lifeline phone offer can depend on inventory, so it’s safer to treat the phone as a possible bonus.
How to apply: Start your truconnect lifeline application through the official provider path, and keep a checklist open like apply Lifeline online.
SafeLink Wireless
Coverage: Availability depends on ZIP code and the offer currently active in your area.
Data/Talk/Text: Plan terms vary, so treat any headline numbers as temporary until checkout.
Device options: Some applicants see phone promotions, while others are guided toward bringing a compatible phone.
ID requirements: Verification is required, and proof may be requested for manual review.
Pros: It can be a strong backup when TruConnect is not available in your ZIP results.
Cons: The final offer can change, so screenshots of your final summary can protect you later.
How to apply: Apply once carefully, then track progress with application status steps if verification takes longer than expected.
Assurance Wireless
Coverage: Availability is ZIP-based, and some areas may have limited service options.
Data/Talk/Text: Monthly details vary by offer and location, so confirm what you see during enrollment.
Device options: Some eligible applicants see device offers, but you should treat them as conditional until confirmed.
ID requirements: Expect identity checks and eligibility verification, with documents requested when needed.
Pros: It can be a practical alternative when you want a guided signup experience.
Cons: Local coverage performance can vary, so signal quality matters more than marketing claims.
How to apply: Use a guided walkthrough like Assurance Wireless Lifeline application steps.
Life Wireless
Coverage: Availability depends on ZIP code, and performance can vary neighborhood to neighborhood.
Data/Talk/Text: Allowances vary by state and offer, so rely on your enrollment summary for final terms.
Device options: Phone promotions may appear for some applicants, but they are not guaranteed and can change with inventory.
ID requirements: Verification applies, and documentation may be requested if systems cannot confirm eligibility automatically.
Pros: It’s a useful backup option if TruConnect is unavailable for your ZIP.
Cons: Applying to multiple providers at once can create duplicates, so choose your primary option first.
How to apply: Prep your paperwork using Lifeline income proof documents before you start.
Access Wireless
Coverage: Service is ZIP-based, so your address is the first filter.
Data/Talk/Text: Plan details vary by offer, so confirm the final summary before submitting.
Device options: Some applicants see device offers, but you should treat the phone as optional until confirmed.
ID requirements: Identity and eligibility checks apply, with documents sometimes required for manual review.
Pros: It can be a fast fallback when you need another provider option quickly.
Cons: Device expectations can create disappointment if you assume every approval includes a phone.
How to apply: If your address is complicated, fix it first with Lifeline address verification.
Related content: If your eligibility comes from benefits, these guides can help you prep faster and calmer.
- If SNAP is your route, use free phones for SNAP.
- If Medicaid is your route, check free phone options for Medicaid recipients.
- If SSI is your route, review free cell phone options for SSI recipients.
TruConnect Lifeline coverage & limitations
The biggest limitation with TruConnect Lifeline is confusing “provider exists” with “provider is available at my address.”
That’s why searching truconnect com lifeline or www truconnect com lifeline is only step one, not the finish line.
Your ZIP code decides whether TruConnect can enroll you, and your local coverage decides how it feels day to day.
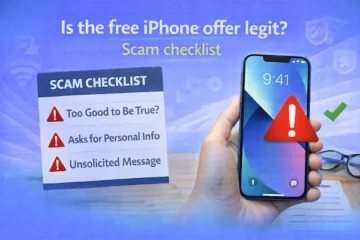
Another limitation is assuming that “free phone” is automatic the moment you qualify.
Search terms like truconnect free government phone and truconnect lifeline free phone are popular, but device inventory can vary and promotions can change.
The safest mindset is treating the phone as a possible bonus, while your real goal is the Lifeline discount on service.
Household rules matter too, because Lifeline is generally limited to one discount per household.
If multiple adults apply at the same address without following the correct household process, approvals can slow down.
If that’s your situation, read Lifeline enrollment for multiple family members before you submit.
Address mismatches are another common reason people get stuck.
Even small differences like “Unit” versus “Apt” can trigger verification problems.
If your address is tricky, prep first using Lifeline address verification.
Documentation requests are normal, and they usually mean the system needs proof to finish eligibility review.
To avoid scrambling later, keep Lifeline income proof documents ready before you start.
You may also see searches like truconnect acp, acp truconnect, truconnect acp program, or truconnect acp application while comparing discounts.
Those searches usually mean you’re looking for additional internet discounts beyond Lifeline, which can depend on current program availability and funding.
The safest move is verifying any ACP-related offer directly in your provider account or official program pages, rather than trusting screenshots from social media.
Finally, approval is not the end of the story, because Lifeline also has ongoing requirements like recertification.
To protect your benefit long-term, save Lifeline recertification deadline and how to complete it now.
If your address, name, or contact details change, update them quickly using update your Lifeline information.
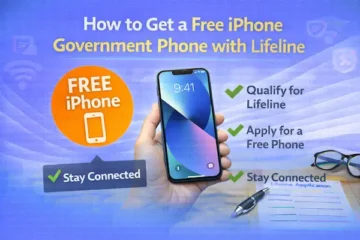
How to apply for TruConnect Lifeline and get a free government phone
You apply for TruConnect Lifeline by confirming ZIP availability, completing eligibility verification, and following activation steps after approval.
The fastest results usually happen when you apply once carefully instead of submitting multiple applications across providers.
- Start by checking availability for your ZIP code, because provider availability depends on ZIP code.
- Decide what you need most, like reliable calling, enough data for essential apps, or a device promotion if available.
- Gather your legal name, date of birth, and address exactly as shown on official records.
- Begin your TruConnect Lifeline application through the official enrollment path and follow every prompt.
- If you are asked for proof, upload documents that are clear, complete, and readable.
- Save your confirmation details and screenshots, because they help if anything needs support later.
- After approval, follow activation instructions and keep your records in a safe place.
If you want a step-by-step checklist you can follow while you apply, use apply Lifeline online free government phone.
If you already applied and you are unsure what is happening, use check Lifeline application status before submitting again.
If you need a safety backup while enrollment is processing, set up a plan using an emergency phone app.
If you later decide TruConnect is not the best fit for your coverage, switching is usually possible when you do it correctly.
Use switch Lifeline providers to reduce downtime and protect your benefit.
Once you focus on ZIP availability, clean verification, and realistic device expectations, getting approved becomes far more predictable.
That’s the calm, practical way to approach TruConnect Lifeline without getting pulled into hype.