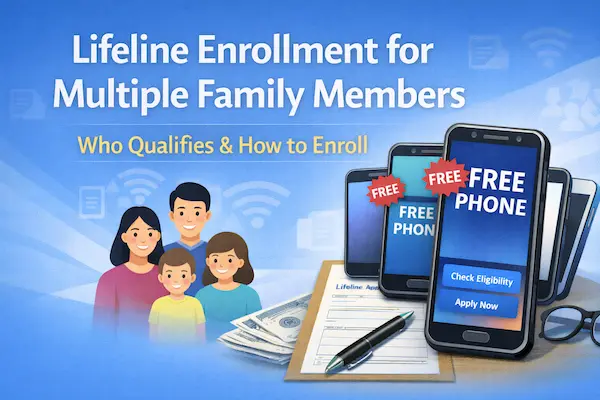
Lifeline enrollment for multiple family members – How to apply
You can’t usually enroll “multiple family members” in Lifeline the way people mean it, because Lifeline is generally one discount per household, not one per person.
The good news is that you can have more than one Lifeline subscriber at the same address if there are separate households living there and you prove it correctly.
Independent guide notice: This tutorial is informational only.
It is not affiliated with, sponsored by, or controlled by the FCC, USAC, LifelineSupport, GetInternet, or any phone or internet company.
Rules and screens can change, so always follow the instructions shown in the official application portal and notices you receive.
Lifeline enrollment for multiple family members: what’s actually allowed
Here’s the rule that decides everything: Lifeline is limited to one benefit per household.
That means if you and your relatives share income or share household expenses, you count as one household, even if you’re all adults.
On the other hand, if multiple adults live at the same address but do not share money, you may count as 2+ households, and each household can apply.
The application system commonly flags this as a duplicate address situation.
When that happens, you’ll usually need to complete a Household Worksheet to show that more than one independent household lives at the same address.
Quick reality-check table (so you don’t waste time)
| Situation at the same address | Counts as one household? | What you should do |
|---|---|---|
| Married couple sharing bills | Yes | Pick one person to apply for the household |
| Parent and adult child sharing groceries and rent | Yes | Apply once, using the household’s eligibility |
| Two families in one house splitting everything separately | No | Each household applies, and complete the Household Worksheet if prompted |
| Roommates (or relatives) who keep finances separate | No | Each household can apply, but expect a duplicate address check |
| Assisted living or group living with separate finances | No | Multiple households can exist at one address |
If you only remember one thing, remember this.
“Multiple family members” only works when you truly have multiple independent households.
Lifeline enrollment for multiple family members: Step-by-step (1–8)
1. Confirm households
First, decide how many households exist at your address.
If you share income or share expenses, you are usually one household.
If you keep finances separate, you may be multiple households at one address.
Example: You and your adult cousin live together, but you buy food separately and pay bills separately.
That can qualify as two households, but you must answer household questions consistently.
2. Pick eligibility
Next, choose how each household qualifies: program-based or income-based.
Program-based usually needs a current benefits letter or official proof when requested.
Income-based usually needs clear income documents that match the household size you claim.
Example: One household uses Medicaid proof, while the other uses SNAP proof.
That can work, as long as each applicant selects the correct option and uploads the right proof if asked.
3. Match your identity
Use your legal name exactly as it appears on your ID and official records.
Double-check your date of birth and Social Security details before you submit.
Small mismatches can trigger an identity error and slow everything down.
Example: Your ID shows “Maria Silva Santos,” but you type “Maria Santos.”
That difference can cause verification problems, so match the full name.
4. Prepare income proof
If your income varies, organize proof that tells a clear story.
A recent tax return is often the simplest document because it summarizes income in one place.
If you do not have a tax return, gather acceptable pay documentation that meets the program’s requirements.
Example: You do gig work and your pay changes weekly.
Using a tax return can be easier than uploading many weekly statements.
5. Apply online
Apply in the official Lifeline portal, one applicant at a time.
Enter the physical home address, not a PO Box.
Keep your info consistent across all applicants who live at the same address.
Example: You receive mail at a PO Box, but you live in an apartment.
You should still enter the apartment as the home address, because it is the physical location.
6. Fix duplicate address
If someone at your address already has Lifeline, you may see a duplicate address flag.
When you truly have separate households, complete the Household Worksheet when prompted.
Answer honestly, and make sure your answers match how you actually handle money.
Example: Two siblings live at the same address and do not share expenses.
That is the type of case where the worksheet helps prove separate households.
7. Handle address changes
If you moved recently, your address may not match older records or your ID.
Be ready to upload proof of address that shows your name and your current physical address.
Make sure the address on your application matches the address on your proof.
Example: Your driver’s license shows your old apartment, but you moved last month.
A current lease or utility bill can help confirm your new address.
8. Enroll with a provider
Approval in the verifier is not the same as having service activated.
After approval, enroll with a participating phone or internet company in your area.
Follow the provider’s instructions, because activation steps can vary.
Example: You get approved today, then contact a participating provider tomorrow to start the discounted plan.
If you already have service, ask the provider how to apply Lifeline to an eligible line when allowed.
Documents you’ll need
You don’t always have to upload documents, because some eligibility checks are verified automatically.
Still, you should be ready to provide proof in case the system requests manual review.
- Identity documents that show your name, date of birth, and the last four digits of your Social Security number (or Tribal ID if applicable).
- Proof you are alive is sometimes required, and it generally needs to show recent “life activity” within the last three months.
- Proof of program participation such as a benefit award letter, benefits statement, verification letter, or an official screenshot of an online benefits portal.
- Proof of income such as a prior year tax return, or other income documentation that meets the program’s rules when requested.
- Proof of address like a utility bill, mortgage statement, lease statement, or another acceptable document showing your name and physical address.
- Household Worksheet if more than one person at the same address is applying for or receiving Lifeline, and you need to show separate households.
Whenever you upload documents, use clear photos or scans.
Blurry images and missing pages are an easy way to trigger delays or denials.
How long it takes
Most people finish the online application quickly, but timing depends on whether you’re verified automatically or need manual review.
- Time to fill out the online application: typically about 10 minutes when you have your info ready.
- If you upload extra info online during business hours: some application error reviews can be processed within minutes, with updates shown in the portal.
- If you mail documents: a review decision is commonly sent by mail within 7 to 10 business days after submission for certain error resolutions.
- Provider enrollment after approval: timing varies by company, so the “last mile” can be same-day or take longer depending on the provider’s process.
Before you submit
This checklist is what keeps confident applications from turning into stressful back-and-forth.
- Match your legal name exactly to your official documents.
- Confirm your date of birth is entered correctly, including the year.
- Use your physical home address, not a PO Box.
- Avoid duplicate applications for the same person, because that can create confusion in status tracking.
- Confirm household truthfully, especially when multiple adults live at the same address.
- Prepare the Household Worksheet if you expect a duplicate address flag.
- Double-check your eligibility path so you don’t pick “income” when you meant “program,” or the other way around.
How to check status
You can usually check your status directly in the online portal you used to apply.
If you prefer human help, the Lifeline Support Center can also help you confirm what’s happening.
- Sign in to your Lifeline application account (the consumer portal you used to submit the application).
- Look for “check application status” or a similar status area on your account homepage.
- Save your application number, because it’s the fastest way for support to locate your file.
- If you need support, call or email the Lifeline Support Center and provide your first and last name, your application number, and the reason you’re contacting them.
- Track any requested documents, and note whether you submitted them online or by mail.
If your status shows an error, treat it like a to-do list.
Resolve the exact error shown, and avoid uploading unrelated documents “just in case,” because that can slow review.
If you get denied
A denial usually means the system couldn’t verify something, not that you “don’t qualify forever.”
In most cases, you can correct the issue by submitting the right proof, fixing a mismatch, or clarifying your household situation.
Corrections that fix most denials (in the real world)
- Read the reason code or denial notice carefully.Fixing the wrong problem is the fastest way to stay denied.
- If the denial is “duplicate address,” complete the Household Worksheet.Make sure your answers match how your home actually handles money and expenses.
- If the denial is identity-related, upload clearer identity proof.Use an unexpired government ID when possible, and ensure the name and birth date are visible.
- If the denial is address-related, prove your physical address.A current lease or utility bill with your name and address is often the simplest fix after a move.
- If the denial is income-related, simplify the story.A prior year tax return can be easier than juggling many variable-income statements.
- If you believe the decision is wrong, consider an appeal within the allowed timeframe.USAC appeals generally must be filed within 60 days of the decision you are appealing, so don’t sit on it.
- When in doubt, contact the Lifeline Support Center with your application number.They can tell you what document type is needed for the specific error you’re seeing.
You’re not trying to “game the system” here.
You’re simply making your eligibility easy to verify, especially when multiple households share one address.
Do that well, and the process feels a lot more predictable.