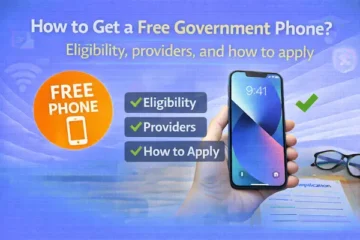
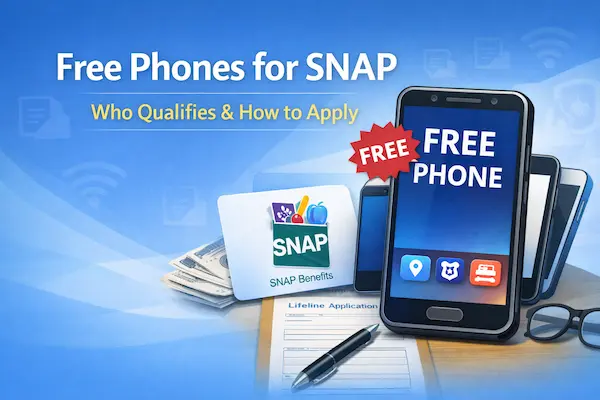
Free phones for SNAP: what you can realistically expect
If you’re searching for free phones for SNAP, you’re usually trying to get reliable phone service without adding another bill.
In most cases, what you’re really qualifying for is the Lifeline benefit, which lowers the monthly cost of phone or internet service.
Some participating companies may also include a phone or SIM as part of their offer, but a “free device” is not guaranteed everywhere.
That’s why people also search terms like snap cell phone service and food stamps cell phone service when they want the full picture.
Once you understand the difference between the benefit and the phone, you’ll make better choices and avoid scams.
Independent notice: This content is for general information only.
We are not affiliated with, sponsored by, or partnered with SNAP, EBT, USAC, the FCC, or any wireless provider.
We do not control eligibility decisions, application systems, plan details, device inventory, shipping, or customer support outcomes.
Now let’s walk through what “SNAP phones” actually means, how to apply correctly, and how to check your status without guessing.
How SNAP connects to the Lifeline benefit
SNAP can help you qualify for Lifeline because participating in certain assistance programs is a common eligibility pathway.
So when you hear “snap cell phone program,” it’s usually shorthand for “Lifeline service you can qualify for using SNAP.”
In everyday language, people say free phone through food stamps because SNAP is also known as food stamps in many conversations.
What matters is that your household meets Lifeline eligibility rules and can be verified through the official process.
Also, the Lifeline discount is generally limited to one per household, not one per person.
A household typically means people who live together and share income and expenses, even if you are not related.
If you live with roommates or extended family at the same address, this is the rule that can make or break your application.
Quick clarity on “EBT government phone”
If you typed ebt government phone, you’re not doing anything wrong, because that phrase is everywhere online.
Still, EBT is simply the benefit card system used to access SNAP funds, not a phone program by itself.
Your SNAP participation can be used as proof for Lifeline eligibility, and a Lifeline provider may offer service and sometimes a device.
That’s the clean, accurate way to think about it.
What you can get with free phones for SNAP
When people say free cell phones for snap recipients, they are usually describing a Lifeline-supported wireless plan and a possible starter phone.
Depending on the provider and your state, your plan may include talk, text, and a monthly data allowance.
Some providers market this as free cell phone service for snap recipients, because the Lifeline discount can cover most or all of a basic plan.
You may also see the phrase free cell phone on food stamps, which points to the same idea through different wording.
In practice, you’re choosing a company that participates in Lifeline and serves your area.
Then the Lifeline benefit is applied to your service once you’re approved and enrolled.
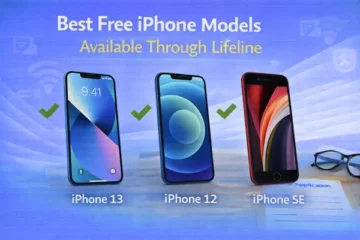
If a provider includes a device, it might be an entry-level smartphone, a refurbished phone, or a “bring your own device” setup with a SIM.
Because inventory and offers change, the safest plan is to focus on eligibility and coverage first, and treat the device as a bonus if available.
Why you’ll see different phrases for the same thing
Online, you’ll see food stamp cell phone and snap program free cell phone used like official program names.
They are usually not official names, and they can be used by both legitimate providers and shady marketers.
That’s why your best move is to apply through official Lifeline verification channels and only use provider sites you trust.
When you keep it official, you reduce the risk of sharing personal information in the wrong place.
Do you qualify for free cell phone service with food stamps
You can often qualify for Lifeline using SNAP participation, but you still must pass identity, eligibility, and household checks.
Many applicants qualify through program participation, while others qualify through income rules based on household size.
If your SNAP is active and your information matches official records, approvals can be faster and smoother.
If your details are inconsistent, you might be asked to upload documents or complete additional steps.
The best strategy is to assume the system will be strict and to prepare a clean application the first time.
That single choice can save you days of back-and-forth later.
The household rule that surprises people
Only one Lifeline benefit is allowed per household, so duplicates can trigger denials or delays.
If you live with other adults, be ready to answer the household question accurately based on shared finances.
If you do not share money and expenses with people at your address, you may be able to qualify as separate households, depending on the process you are asked to follow.
In real life, this often comes up with roommates, multi-family homes, and shared living situations.
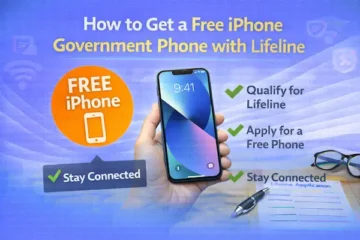
How to apply for free phones for SNAP
You can apply for free phones for SNAP by completing Lifeline eligibility verification and then enrolling with a participating provider.
This is the operational tutorial that helps you avoid duplicates, avoid document rejections, and track your status clearly.
Step-by-step (1–8)
- Confirm that no one in your household is already receiving a Lifeline benefit with another company.
- Decide how you will qualify, using either SNAP participation or income eligibility based on household size.
- Start the application through the official Lifeline eligibility process, which may include the National Verifier in most states.
- Enter your legal name, date of birth, and address exactly as they appear on your official documents.
- If asked, upload proof of SNAP participation, making sure the document is readable and shows the required details.
- Save your confirmation details, especially your application ID or reference number, because that is how you track progress later.
- After you qualify, choose a Lifeline provider in your area and complete provider enrollment for snap cell phone service or Lifeline internet.
- Activate service by following provider instructions for SIM activation, phone setup, or “bring your own device” steps.
If you recently moved, use your current address consistently and include the apartment number exactly the same way everywhere.
If your income varies, do not panic, because program qualification through SNAP may be simpler than income qualification for many people.
If multiple adults live at your address, slow down at the household question, because a wrong answer is a common reason for a stalled application.
If your SNAP case is under a different name format than your ID, match your application details to your legal documents and use clear proof if requested.
Documents you’ll need
You do not need a giant stack of paperwork, but you do need proof that is current, readable, and matches your application details.
- SNAP proof, such as a benefits letter, approval notice, or official document that shows your name and program participation.
- Identity proof, such as a government-issued ID, in case automated checks cannot confirm your identity.
- Address proof, such as a qualifying document showing your current address, especially after a move.
- Household clarification information, if more than one adult at your address is applying and you are separate households.
If your SNAP document is blurry, cropped, or missing key details, replace it before you upload it.
If you only have screenshots, make sure they show the full information requested, including dates and agency details when applicable.
How long it takes
Some applications are decided quickly when your identity and eligibility match available records automatically.
Other applications take longer when documents require manual review or when household questions need clarification.
If you apply by mail in a state that supports it, expect a longer timeline because processing depends on receipt and workload.
If you apply through a provider, you may see two timelines, which are eligibility verification and provider enrollment or shipping.
A realistic way to plan is to set aside 30 to 45 minutes to apply carefully, and then watch for follow-up requests that could extend the timeline.
Before you submit
This checklist protects you from the most common avoidable delays.
- Review your name spelling and make sure it matches your ID, including hyphens and middle initials.
- Confirm your date of birth is correct, because one digit wrong can block automated verification.
- Use the same address format everywhere, including apartment numbers and directional letters.
- Confirm your household answer is accurate based on shared income and expenses.
- Avoid submitting multiple applications “just in case,” because duplicates can create a conflict.
- Check that your uploads are readable, complete, and show the required dates and details.
If anything looks inconsistent, fix it now, because corrections after submission often slow the process.
How to check status
You can check status in the system that verified your eligibility, and you can also check the provider’s status tools for service steps.
If you applied through the National Verifier, your eligibility status is usually visible inside your account.
If you enrolled through a provider, the provider may show a separate status for enrollment, SIM activation, or phone shipping.
This is why people can feel stuck even when they are actually approved, because the provider step may still be in progress.
If you are unsure which step is pending, look for the most recent message requesting action, such as “upload documents” or “confirm household.”
If you need help understanding what you see, the Lifeline Support Center can explain document requests and application steps using your application details.
If you get denied
If you get denied, the denial reason usually tells you what to fix, and many denials are correctable.
The most common reasons are mismatched identity details, outdated or unreadable documents, and household duplication conflicts.
- If the denial is identity-related, recheck your legal name format and provide clearer identity proof if requested.
- If the denial is address-related, submit accepted proof of your current address and keep the format consistent.
- If the denial is SNAP-proof-related, upload a more recent official benefits letter or notice with clear participation details.
- If the denial is household duplication, complete the required household clarification steps for multiple subscribers at one address.
- If the denial is “unable to verify,” review every field for typos and resubmit with clean, readable proof.
If you try to fix everything at once, you can accidentally create new inconsistencies, so focus only on the specific denial reason.
If you are unsure what the denial code means, get guidance before resubmitting so you do not repeat the same error.
Choosing a provider safely without falling for scams
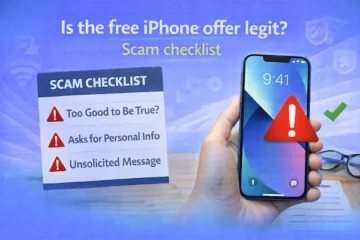
Your Lifeline benefit is real, but the internet is full of fake pages promising instant approval and “guaranteed iPhones.”
A legitimate provider will clearly explain the Lifeline benefit, request verification through official processes, and never pressure you to pay for approval.
You should be cautious if a site demands sensitive information without explaining why, or if it asks for unusual fees to “unlock” a free benefit.
If you see ads claiming free cell phone service with food stamps with no mention of Lifeline rules, treat that as a red flag.
If the language feels rushed, manipulative, or too good to be true, pause and verify you are using an official channel.
You can also protect yourself by keeping a simple rule.
You only submit your personal information through official Lifeline verification channels or established provider websites you trust.
A simple comparison checklist for snap cell phone service
When two providers both look good, compare them using practical factors that affect your daily life.
- Check coverage in the places you actually spend time, like home, work, and school routes.
- Confirm whether they offer a phone, a SIM, or a bring-your-own-device option.
- Review what the plan includes, especially data allowances and hotspot rules if you need them.
- Look at how you manage the account, because easy account access can prevent missed notices.
- Understand recertification requirements, because you must respond on time to keep the benefit active.
This is how you turn “I need help” into a stable setup that supports your job search, healthcare, school, and family needs.
Free phones for SNAP: the one mindset that makes approval easier
The best way to get approved is to treat your application like a one-time verification task you want to do cleanly.
When your name, address, household answers, and documents match the rules, the system has fewer reasons to slow you down.
Once you’re enrolled, keep an eye on notices so you do not miss recertification deadlines.
If your address changes, update it promptly, because mismatches can create problems later.
When you approach it this way, “free phones for snap” stops being a confusing internet phrase and becomes a clear, doable process.