Lifeline income proof documents (examples)
If you are applying based on income, the goal is simple.
You must show a document that clearly proves your annual household income.
The fastest way to avoid delays is to choose the right document type first, then make sure it shows the required details.
Once you do that, your application becomes much easier to verify.
Independent guide notice: This tutorial is informational only.
It is not affiliated with, sponsored by, or controlled by the FCC, USAC, Lifeline Support, GetInternet, or any phone or internet company.
Rules and portal screens can change, so follow the official instructions shown during your application.
Lifeline income proof documents: what your proof must show
Lifeline income proof documents must show who you are and what your annual income is.
In practice, that means your document needs your name and a clear income amount that supports an annual figure.
If your document does not cover a full year, you typically need the same type of document covering three months in a row within the last 12 months.
When your paperwork is missing one of those pieces, you often get a request for more proof.
So you want to “build the file” correctly before you ever hit submit.
Quick examples of “good” vs “risky” proof
A prior-year tax return is usually “good” because it summarizes annual income in one place.
Three consecutive months of pay stubs can also be “good” because it shows consistent income coverage.
A random single pay stub is often “risky” because it may not cover enough time to support an annual income review.
A blurry photo is always “risky,” even if the document itself is perfect.
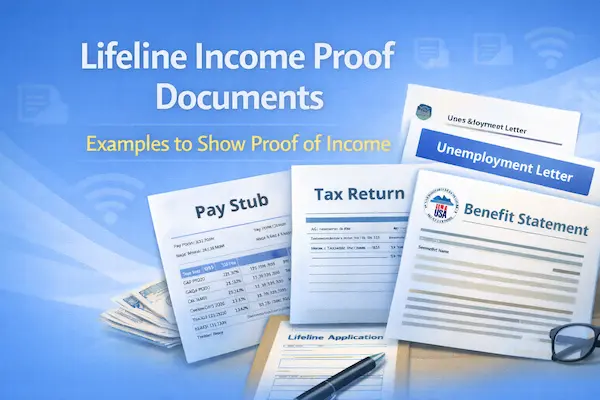
Common Lifeline income proof documents (examples)
| Document example | Best for | What must be visible |
|---|---|---|
| Prior year state, federal, or Tribal tax return | Gig work, seasonal work, mixed income sources | Your name and annual income details |
| Current income statement from your employer | Steady employment | Your name and income amount |
| Paycheck stub | Hourly or salary jobs | Your name and dates, covering the needed time period |
| Unemployment or Workers’ Compensation statement of benefits | Benefits-based income | Your name and benefit amount |
| Veterans Administration statement of benefits | VA-based income | Your name and benefit amount |
| Federal or Tribal notice letter for General Assistance | General Assistance income | Your name and program income information |
| Divorce decree or child support award | Child support income | Your name and income award details |
| Other official document containing income information | Unique situations | Your name, income info, and a recent issue date |
If you’re unsure which one fits you, start with the document that most clearly shows annual income.
Clarity beats creativity every time.
Lifeline income proof documents: Step-by-step (1–8)
1. Confirm you’re using income
First, confirm you are applying based on household income, not a qualifying program.
If you qualify through SNAP, Medicaid, SSI, or another program, you may not need income proof at all.
Income proof is specifically for income-based eligibility.
Example: You do not receive benefits, but your income is within the limit for your household size.
In that case, income documents are your main proof.
2. Lock your household size
Next, decide who is in your household for the application.
Household size affects the income guideline you are compared against.
Include the people who share income and expenses with you.
Example: You live with your partner and you share rent, groceries, and bills.
That usually means you count each other in the same household.
Example: You rent a room and you do not share money with anyone in the home.
That situation may be a separate household, and household questions must match that reality.
3. Pick your strongest document
Choose the document that makes your annual income easiest to verify.
A prior year tax return is often the cleanest option when you have variable income.
If you are employed and paid regularly, an employer income statement or pay documentation can work well.
If you receive benefits income, a benefits statement can be the most direct proof.
Example: You drive for apps and your pay changes weekly.
A tax return usually tells the story better than dozens of weekly screenshots.
4. Make sure the document has the required details
Before you upload anything, check the basics.
Your document should show your first and last name, or your dependent’s name when applicable.
Your document should show your annual income, or enough information to support it.
Your document should be an official record, not a handwritten note.
Example: Your pay stub shows your name, pay period, and earnings, but the photo cuts off the dates.
Retake the photo so the dates are fully visible.
5. If it’s not a full year, cover 3 months in a row
If your proof does not cover a full year, plan for the “three months in a row” rule.
Use the same type of document for three consecutive months within the past 12 months.
This is common for pay stubs and other current earnings proof.
Example: You want to upload pay stubs.
Choose three months in a row, and make sure the stubs fall within the last 12 months.
6. Handle variable income the smart way
Variable income is normal, and it can still be verified cleanly.
Use a tax return when possible, because it reflects your overall annual income.
If you cannot use a tax return, use official income proof that consistently covers the required time.
Example: You work seasonal construction and your income spikes in summer.
Your tax return can be the simplest “one document” summary of that pattern.
Example: You receive child support and part-time wages.
You may need documents that reflect both sources if requested.
7. Watch for address changes
Moving does not change your income, but it can cause verification issues if your records look inconsistent.
If your pay stubs or employer statement show an old address, do not panic.
Income documents mainly need your name and income details.
Still, you may separately be asked to prove your current physical address during the application.
Example: You moved last month and your ID still shows the old apartment.
Keep a lease or utility bill ready in case the portal requests address proof.
8. Upload cleanly and keep proof
When you upload, use clear photos or scans with full pages visible.
Avoid glare, blur, and cut-off corners.
Do not submit original documents if you are mailing proof.
Save your confirmation details, including any application number and upload confirmations.
Example: You upload documents and later you get asked for them again.
A saved confirmation makes it easier to explain what you already submitted.
Documents you’ll need
You may not be asked to upload documents if your information verifies automatically.
Still, it helps to prepare a simple folder on your phone so you can respond fast if the system requests proof.
- Income proof that shows your name and annual income, using the examples above.
- Identity proof, such as a government-issued ID, if the portal requests it.
- Social Security or Tribal ID proof, if you are asked to confirm those details.
- Proof of address, such as a lease or utility bill, if an address check is triggered.
- Household documentation, such as a Household Worksheet, if a duplicate address or household issue appears.
If you are applying for a child or dependent, keep documents that show the dependent’s name when required.
That small detail can prevent a frustrating back-and-forth later.
How long it takes
Most people choose the document first, then finish the upload in minutes.
The timeline depends on whether you are verified automatically or need manual review.
- Application time: often 10 to 15 minutes when your info is ready.
- Online error fixes: when you submit requested proof online during listed business hours, reviews can be very fast.
- Mail review: mailed documents usually take longer because you add shipping time plus processing time.
- Provider enrollment: after approval, activation timing depends on the company’s process and your area.
If you are trying to start service quickly, online uploads and clear photos make the biggest difference.
Speed usually comes from clarity.
Before you submit
This checklist is your “confidence filter” before you hit the final button.
- Match your legal name exactly to your documents, including middle names and hyphens.
- Confirm household size matches your real life and your income story.
- Avoid duplicate applications for the same person, because it can confuse status tracking.
- Choose the right income proof type, and cover three consecutive months if your proof is not annual.
- Check image quality so every page is readable and complete.
- Keep copies of what you upload or mail, including dates.
If something feels unclear, pause and fix the file.
It is easier to prevent a document request than to react to one.
How to check status
You can usually check your status in the same official portal you used to apply or upload proof.
Status checks go smoother when you keep your application details saved.
- Sign in to your application account.
- Open the area that shows your application status or messages.
- Look for specific requests like “income proof needed” or “manual review.”
- Confirm whether the portal shows your upload as received.
- If you contact support, share your application details so your record can be found quickly.
If you see an error message, treat it like a checklist.
Resolve the exact request shown, and avoid uploading unrelated documents “just in case.”
If you get denied
If you get denied, it usually means your income proof could not be verified as submitted.
The fix is almost always to correct the missing detail, replace the document type, or improve readability.
Corrections that fix most income-proof denials
- Your document does not show your annual income.Switch to a prior year tax return, or submit the required time coverage for pay documentation.
- Your pay documentation does not cover three months in a row.Resubmit pay stubs for three consecutive months within the last 12 months.
- Your name is missing or does not match.Use a document that shows your first and last name clearly, and match spelling exactly in the application.
- Your images are blurry or cut off.Retake photos in good light, capture the full page, and avoid glare.
- Your household size does not match your income story.Correct household answers so they reflect who shares income and expenses with you.
- You used a non-official document.Replace it with an official income record, such as a tax return, employer statement, or benefits statement.
If you correct the specific denial reason and resubmit clean proof, outcomes become much more predictable.
You are not trying to “prove more,” you are trying to prove the right thing, the right way.