How to switch Lifeline providers
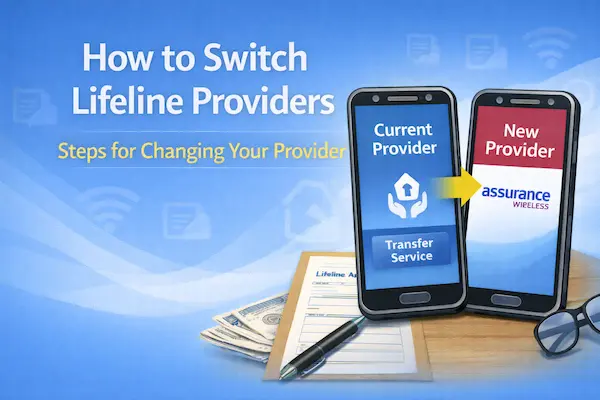
If you want to switch Lifeline providers, the simplest path is to ask your new company to transfer your Lifeline benefit to them.
You do not “carry” the discount yourself like a coupon.
Instead, your new provider requests the transfer, and you give consent so your benefit moves from the old company to the new one.
This matters because Lifeline is generally limited to one benefit per household.
That is why switching is about doing it cleanly, not doing it fast and messy.
Independent guide notice: This tutorial is informational only.
It is not affiliated with, sponsored by, or controlled by the FCC, USAC, Lifeline Support, GetInternet, or any phone or internet company.
Rules and portal screens can change, so follow the official instructions you see during your application and enrollment.
Switch Lifeline providers: what switching really means
Switching means you keep the same Lifeline benefit, but you change which company applies it to your service.
You can usually transfer at any time, but you must follow the transfer steps your new provider gives you.
Sometimes you may be asked to reapply or re-verify before the transfer completes.
If you live with other adults, household rules still apply, even when you switch.
When multiple people try to claim Lifeline at the same address, the system can flag it as a household issue.
So you want your household answers to be consistent and true to your real life.
Switch Lifeline providers: Step-by-step (1–8)
1. Confirm your household
Start by confirming you are the only Lifeline benefit in your household.
If someone else at your address already has Lifeline, stop and clarify whether you are the same household.
A household is about sharing income and expenses, not about being related.
Example: You move in with your parents and you share groceries and bills.
In that case, your home is typically one household, and you should not try to keep two Lifeline benefits.
Example: You rent a separate room and you do not share money with anyone.
In that case, you may be a separate household, and you may be asked for a household worksheet.
2. Decide what you want to change
Next, decide what you are switching for, so you can choose the right company.
Maybe you want better coverage where you live.
Maybe you want home internet instead of a mobile plan.
Maybe you want to keep your phone number, or bring your own device.
Example: You are fine with your plan, but calls drop at your new job site.
In that situation, choosing a provider with stronger coverage in your ZIP code is the real upgrade.
3. Find providers in your ZIP code
Look for participating lifeline service providers that actually serve your address.
Availability can change street by street, so your ZIP code matters more than brand names.
If you search online, you will see phrases like lifeline phone service providers and lifeline cell phone providers.
You may also see broad lists labeled government phone companies.
Some sites market the program as a “free phone,” so you may see searches like free lifeline phone service providers.
Keep your expectations realistic, because Lifeline is a monthly discount, and any device offer depends on the company and stock.
To stay grounded, treat brand searches as starting points, not guarantees.
For example, people often type safelink free government phone, q link free phone, access wireless free government phone, or life wireless free phone.
You may even see queries like verizon free government phone or verizon wireless free government phone.
Likewise, some people search at&t wireless free government phone or at&t wireless free government phones.
You might also run into phrases like verizon lifeline, verizon lifeline program, or verizon wireless lifeline program.
The key is simple: confirm eligibility steps and availability in the official flow and with the provider before you assume a brand is available in your area.
4. Gather your transfer details
Before you apply with the new company, gather the exact details they will ask for.
Use your legal name exactly as it appears on your ID.
Confirm your date of birth matches your documents.
Have your home address written in the same format you use for mail, including apartment number.
Prepare the last four digits of your Social Security number, or your Tribal ID number if that is what you use.
Example: Your ID says “Ana Maria Lopez” but your account shows “Ana Lopez.”
Fix the mismatch first, because small differences can trigger identity or verification errors.
5. Start the transfer with the new provider
Contact the new provider and tell them you want to switch Lifeline providers by transferring your benefit.
Follow their enrollment steps carefully, because the new provider usually initiates the transfer request.
Expect a consent step, because your benefit cannot move without your permission.
Sometimes the provider will ask you to complete a National Verifier check again.
If that happens, complete the application once, and keep your application confirmation details.
Example: Your new provider says they cannot transfer until your eligibility is verified again.
In that case, you are not “starting over,” you are just completing the verification they need to finish the switch.
6. Do not cancel too early
Avoid canceling your old service before the transfer is confirmed.
Canceling early can create gaps in service and can make your account history harder to track.
Instead, let the transfer process move the benefit cleanly to the new company.
If you need overlap for safety, plan a short overlap using regular service, not two Lifeline benefits.
Example: You need your current number for work texts this week.
In that case, ask the new provider about timing before you shut anything off.
7. Handle your phone number and device
If you want to keep your phone number, ask the new provider about porting.
Moving to a new area can affect number portability, so confirm it upfront.
If you are bringing your own phone, confirm the device is compatible and unlocked.
When the new SIM arrives, insert it only when the provider tells you the transfer is ready.
Example: Your number is tied to banking codes and medical portals.
Update your key accounts if you must change numbers, so you do not get locked out later.
8. Confirm the discount is active
Once service starts, confirm the Lifeline discount is actually applied.
Check your account dashboard, your plan details, or your first statement if the provider uses billing.
Test calling, texting, and data, or test your internet connection if you switched to broadband.
Save screenshots or confirmation emails so you have proof of the activation date.
Example: Your service works, but the account shows a standard plan price.
In that case, contact the provider immediately and ask them to confirm the Lifeline benefit transfer status.
Documents you’ll need
You may not be asked to upload documents if your eligibility verifies automatically.
Still, having a simple folder ready makes switching smoother when a manual check happens.
- Proof of identity, such as an unexpired government-issued ID.
- Proof of address, such as a lease, mortgage statement, or utility bill with your name and physical address.
- Program participation proof, such as a benefits letter or official statement, if the system cannot confirm you automatically.
- Income proof, such as a tax return, if you qualify by income and you are asked to document it.
- Household documentation, such as a Household Worksheet, if multiple adults live at the same address and you must prove separate households.
If your income is variable, pick documents that tell a clear story.
A recent tax return often explains seasonal work, gig work, and tips better than scattered weekly screenshots.
Example: You do delivery apps and your pay changes every week.
In that case, a tax return can be simpler than uploading many separate statements.
How long it takes
Switching speed depends on verification, provider processing, and whether you need to upload documents.
Shopping and comparing options can take longer than the actual transfer.
If your information verifies automatically, the process can feel quick.
If you must submit documents, the timeline depends on the submission method.
- Online submissions can update fast when you provide exactly what is requested.
- Mail submissions take longer because you add shipping time and manual review.
- Provider activation timing varies, so ask your new company what to expect for your area.
If you need your number ported, build in extra patience, because number moves can add steps.
The goal is not “fast,” it is “clean and confirmed.”
Before you submit
Use this checklist to avoid the most common switching mistakes.
- Match your legal name to your ID, including middle names and hyphens.
- Confirm your date of birth and your address format before you hit submit.
- Use your physical address, not a PO Box, for your home address.
- Avoid duplicate applications by submitting once and tracking that same request.
- Confirm your household, especially if you live with family, roommates, or multiple adults at one address.
- Do not try to keep two Lifeline discounts, because one benefit per household is the core rule.
- Take clear photos of documents with full pages visible and no blurry corners.
- Save your confirmation details, such as an application number or a provider confirmation message.
How to check status
Status is easiest to track when you separate “eligibility status” from “provider activation status.”
Eligibility status is about whether you qualify.
Activation status is about whether your provider finished applying the benefit to your service.
- Sign in to the official consumer portal you used for eligibility, if you were asked to apply or re-verify.
- Look for an application status area and read any messages requesting documents.
- Write down your application number or confirmation details.
- Contact the new provider and ask whether the benefit transfer is pending, processing, or completed.
- If you are stuck between the portal and the provider, contact the Lifeline Support Center and share your application details.
If you see an error message, treat it like a checklist.
Fix the exact issue shown, and avoid uploading random extras that were not requested.
If you get denied
A denial usually means something could not be verified, not that you can never qualify.
Most denials are fixable once you correct the specific reason shown on your notice or status screen.
Corrections that solve the most common denials
- Household or duplicate benefit issue.Confirm whether someone at your address already has Lifeline, and complete a Household Worksheet if requested.Make sure your answers match real life, especially around shared expenses and shared income.
- Identity mismatch.Fix spelling differences, missing middle names, or incorrect birth dates.Upload a clearer ID if the system requests identity proof.
- Address could not be verified.Submit a lease or utility bill showing your name and your physical address.Match the format exactly, including unit numbers and ZIP code.
Example: Your application says “Apt 2B,” but your lease says “Unit 2-B.”
Use one consistent format everywhere you can.
- Program participation not confirmed.Submit an official benefits document that shows your name and current participation.Choose the most recent document available.
- Income proof needed.Use a tax return when possible, especially if you have variable income.Confirm your household size matches what you claimed.
- Transfer consent missing or incomplete.Ask your new provider to resend the consent step and confirm they received your approval.Once consent is confirmed, the transfer process is usually much smoother.
If you correct the exact denial reason and submit clean proof, approvals become far more predictable.
When you feel unsure, get help from official support rather than guessing and creating inconsistencies.