Lifeline recertification deadline (how to complete)
Meet your Lifeline recertification deadline with a tutorial, documents checklist, timelines, and denial fixes.
Independent info notice: This content is educational and independent.
It is not affiliated with, sponsored by, or controlled by the FCC, USAC, or any Lifeline provider.
Always follow the instructions on your official recertification notice, because processes can vary by state and situation.
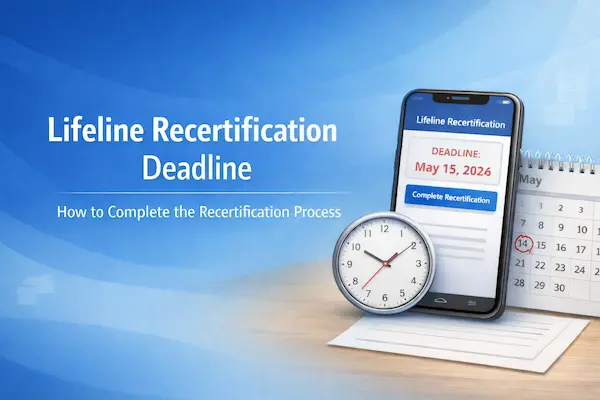
Lifeline recertification deadline: where to find yours and what it means
Your Lifeline recertification deadline is the exact date printed on your recertification letter or message.
That deadline is the cutoff for confirming you still qualify, so your benefit doesn’t get removed for non-response.
In many cases, you’re given a set window to respond, and your notice tells you what that window is.
If you complete recertification before the date listed, you usually avoid any interruption headaches.
When your notice says you can recertify online, it often gives you an Application ID to use.
If you don’t see a deadline, look again for wording like “respond by,” “due by,” or “complete within.”
When anything feels unclear, your safest move is to contact the Lifeline Support Center and ask what your notice requires.
What happens if you miss Lifeline recertification
If you miss Lifeline recertification, you can lose the benefit and be de-enrolled, even if you still qualify.
That’s why the deadline matters more than the method you choose, because non-response is treated as a failed recertification.
Sometimes recertification is automatic and you don’t need to do anything, so your notice is the best source of truth.
When you are asked to provide additional information, responding within the requested timeframe is what protects your enrollment.
If you moved, changed your name, or changed your household situation, those updates can also affect what the system can verify.
For variable income, the key is proving you qualify using accepted documentation for the timeframe requested.
If you share money and expenses with others in your home, remember Lifeline is limited to one benefit per household.
Step-by-step: Lifeline recertification (1–8)
1) Read your notice and write down the deadline
Start by locating the due date and circling it, because that is your Lifeline recertification deadline.
Next, note any Application ID, confirmation code, or instructions listed for your recertification method.
If your notice mentions a state administrator, follow that route, because some states use separate processes.
2) Confirm you still qualify before you submit
Check whether you qualify through a participating program or through income based on your household size.
If your income varies, gather proof that matches what the request is asking you to show.
When your situation changed recently, do not guess, and choose documentation that reflects the correct period.
3) Choose the method that matches your notice
Pick the option listed on your notice, because not every method is available for every person.
Online is often the fastest approach, and many people search for lifeline recertification online for that reason.
If you prefer mail, you will typically complete a lifeline recertification form and send it to the address provided.
Phone recertification can be available for certain consumers when no document upload is needed.
4) Complete the recertification carefully
Enter your information exactly as it appears on official documents, including spelling, spacing, and hyphens.
Use your legal name, your correct date of birth, and the identifier requested, such as SSN last four digits or Tribal ID.
If your household has multiple adults, answer household questions consistently, because mismatches can trigger flags.
When you see the phrase recertify lifeline or recertify for lifeline, it simply means confirming eligibility again.
5) If you need to upload or mail documents, send clean proof
Submit clear, readable copies that show your name plus the required details, not cropped or blurry photos.
For address issues, include the full address with apartment or unit number, because missing units cause failures.
For income proof, provide documents that match the timeframe requested, especially if pay changes week to week.
If you need to show you are separate households at one address, complete the worksheet fully and consistently.
6) Watch for provider-specific wording without getting confused
If your company is SafeLink, you might see people search recertify safelink or type www safelink com recertification.
Some people also type safelink wireless com recertification when they mean the brand’s recertification help page.
If your company is Assurance Wireless, you may see searches like assurance wireless recertify in forums and FAQs.
If your company is StandUp Wireless, you might notice the phrase standup wireless recertification in reminders.
Even with brand wording, you should still rely on your official notice and the official Lifeline support channels for instructions.
7) Save your confirmation right away
After you submit, save the confirmation screen, confirmation number, or any receipt message you receive.
For mail submissions, keep a copy of the form and consider tracking your mail so you can prove it was sent.
For phone submissions, write down the date, time, and the number you called, plus any confirmation given.
8) Check status and respond to follow-ups quickly
Status updates can be immediate for online checks, but document review can add time.
If you get a request for more information, respond as soon as you can, because delays can push you past the deadline window.
When something looks stuck, use the status steps below so you are not guessing.
Documents you’ll need
You only need documents if the system cannot automatically confirm your identity, eligibility, or household details.
When documents are required, sending the best proof the first time is the easiest way to avoid denial.
- Identity: driver’s license, state ID, passport, or Tribal ID, as accepted for verification.
- Program participation: an official award letter or benefits statement showing your name and the program.
- Income: recent pay stubs, a tax return, Social Security statement, or unemployment benefits proof.
- Address change: lease, mortgage statement, utility bill, or government letter with your full new address.
- Household worksheet: needed when more than one Lifeline subscriber appears at the same address.
If your document does not clearly show your name and the required detail, choose a different document before submitting.
Whenever you photograph documents, capture the full page with all corners visible and no glare.
Before you submit
This quick checklist prevents most recertification problems before they happen.
- Verify the deadline: confirm you are submitting before your Lifeline recertification deadline.
- Match your legal name: use the same spelling you have on your government ID.
- Confirm date of birth: check the month, day, and year carefully for typos.
- Avoid duplicate submissions: do not submit online and mail at the same time unless you are instructed.
- Confirm household rules: if you share money and expenses, your home is one household for Lifeline.
- Use the cleanest proof: pick documents that show the required fields clearly in one page.
If you’re trying to recertify in a hurry, accuracy beats speed, because one mismatch can slow everything down.
How to check status
You can check your recertification status using the channel you used to submit, plus official Lifeline support if needed.
Online submissions often show pass or fail right away, which removes a lot of uncertainty.
- If you recertified by phone: keep your Application ID handy and save any confirmation you received.
- If you mailed a form: track your mailing date and keep a copy of what you sent.
- For official help: contact the Lifeline Support Center by phone or email with your identifying details.
If your provider gives you separate account notices, treat them as helpful reminders, but let the official recertification notice guide your steps.
How long it takes
Lifeline recertification can be instant online, while mail and document review can take longer.
When your eligibility is confirmed electronically, you often see an immediate result after submission.
If the system needs documents, the timeline depends on review and whether your proof is complete and readable.
Mail adds extra time because it includes delivery plus processing, so sending it early is your best protection.
If your notice says you must provide additional information within a certain number of days, treat that as a hard deadline.
When you are close to the due date, choosing the fastest eligible method can reduce stress.
If you get denied
If you get denied, the fix is usually correcting a mismatch or submitting stronger documentation for the exact item requested.
Most denials happen because identity details don’t match, documents are unreadable, or household questions trigger a duplicate flag.
Common denial reasons
- Name or DOB mismatch: your entry does not match official records, so re-submit with exact legal details.
- Identity cannot be confirmed: you may need to provide an unexpired official document showing the required fields.
- Eligibility not verified: the program database check fails and you must submit proof of participation or income.
- Household duplication: another subscriber at the same address triggers a worksheet requirement.
- Address issues: missing apartment numbers or non-standard formatting causes the address to fail validation.
Corrections: what to do next
- Read the denial reason carefully and identify the single field or document that failed.
- Correct only what is requested first, so you don’t create a new mismatch elsewhere.
- Re-submit using the same route described in your notice, whether online, mail, or phone.
- Upgrade your documentation quality, using clearer images or more official proof with the required details.
- Contact official Lifeline support if the denial reason is confusing or you believe it is an error.
If you are denied close to the deadline, prioritize the fastest correction method allowed by your notice.
Real-life situations that change how recertification goes
Small life changes can create big verification problems, so it helps to plan for them before you submit.
You changed your address recently
Address changes can fail when a unit number is missing or a document does not show the full new address.
Use a lease or utility bill that clearly shows your name and complete address, including apartment or lot.
Your income is variable
Variable income is manageable when you provide the right proof for the requested timeframe.
Choose documents that reflect your current eligibility picture rather than a single unusually high paycheck.
You live with other adults
Household questions matter because Lifeline is one benefit per household, not one per person.
If you are separate households at one address, be ready for the household worksheet and answer it consistently.
Final reminder so you finish with confidence
If you follow the eight steps above and submit before the deadline on your notice, you’re doing the right thing.
Keep your confirmation, check status if you do not see progress, and respond quickly if documents are requested.
With a clean submission and the right proof, Lifeline recertification becomes a simple yearly task instead of a surprise.